Frame Objects with Perspective Camera with padding in Maya

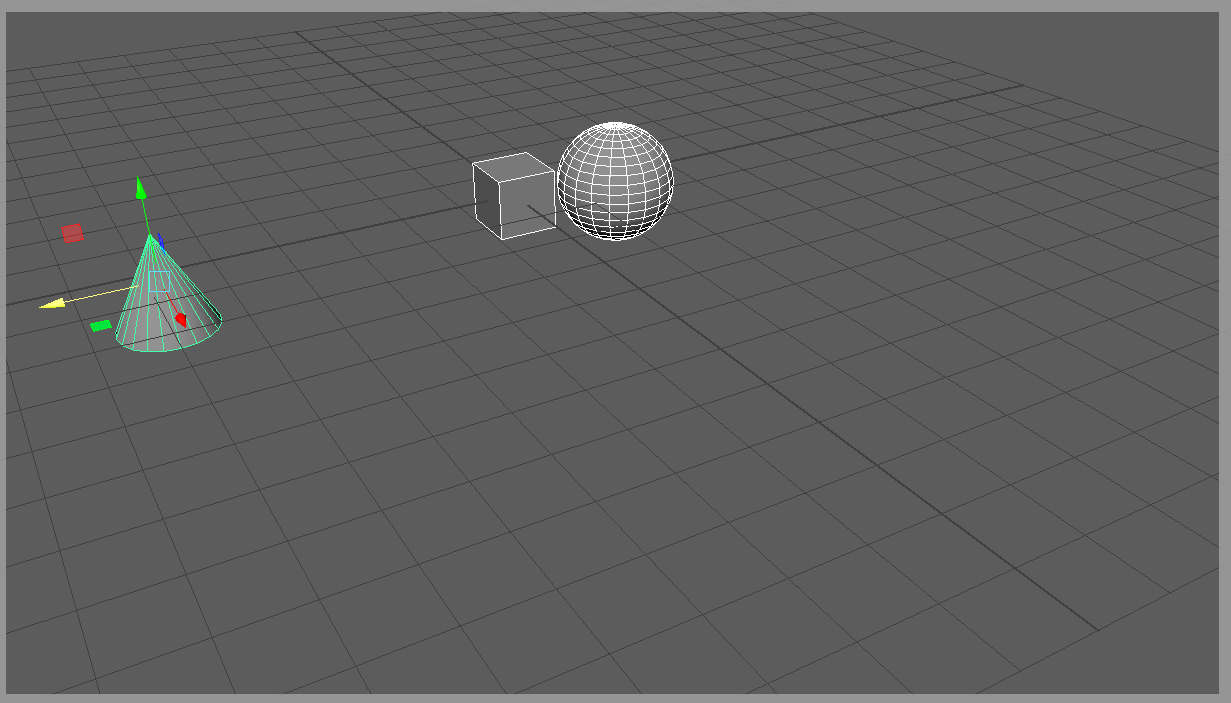
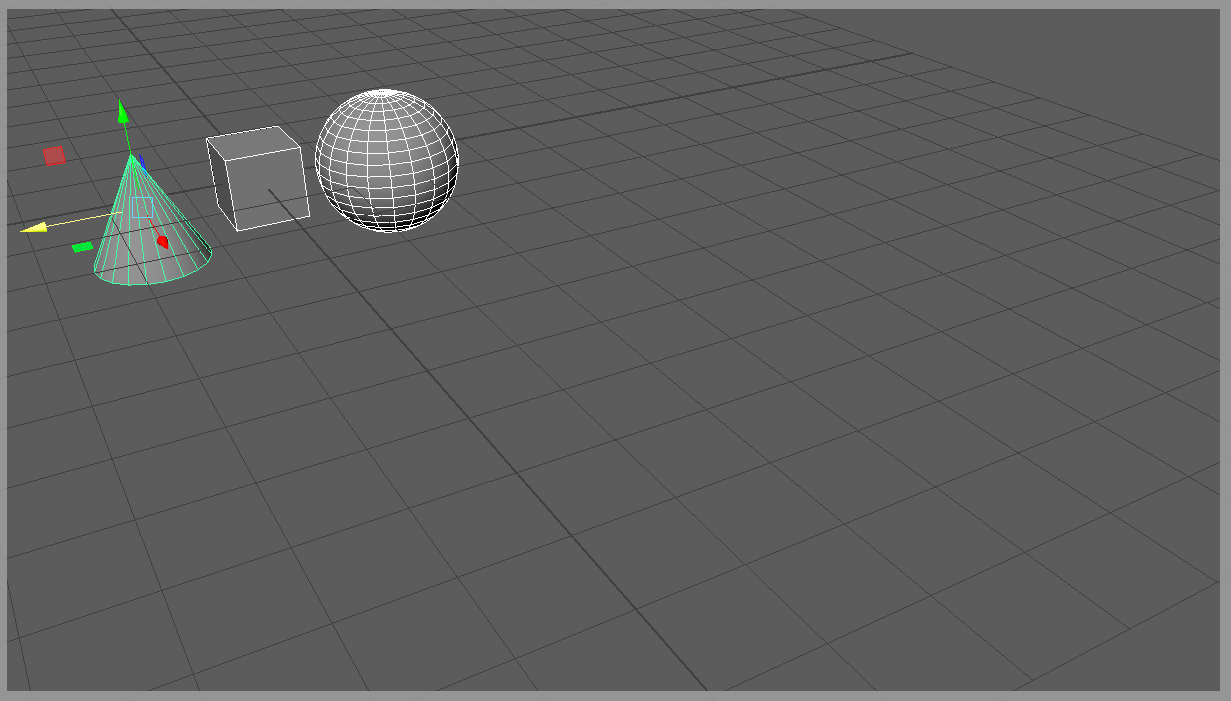
I ran into a situation where the user needed a tool to reframe a perspective camera to an object while allowing to add a minimum padding between the object and the edge of the frame. Using cmds.viewFit(…) will get the selected object in view, but it doesn’t behave like I expected. Neither command zooms close enough so the object touches opposite edges of the frame; there’s always padding around the object.

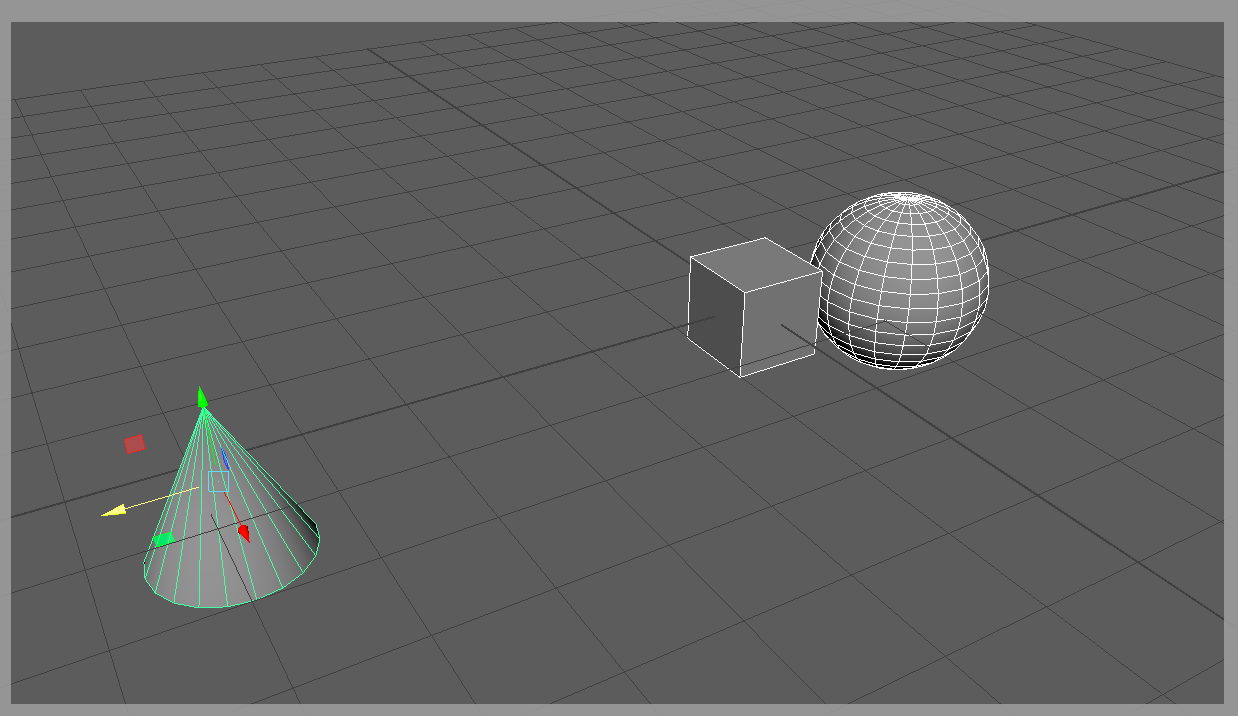
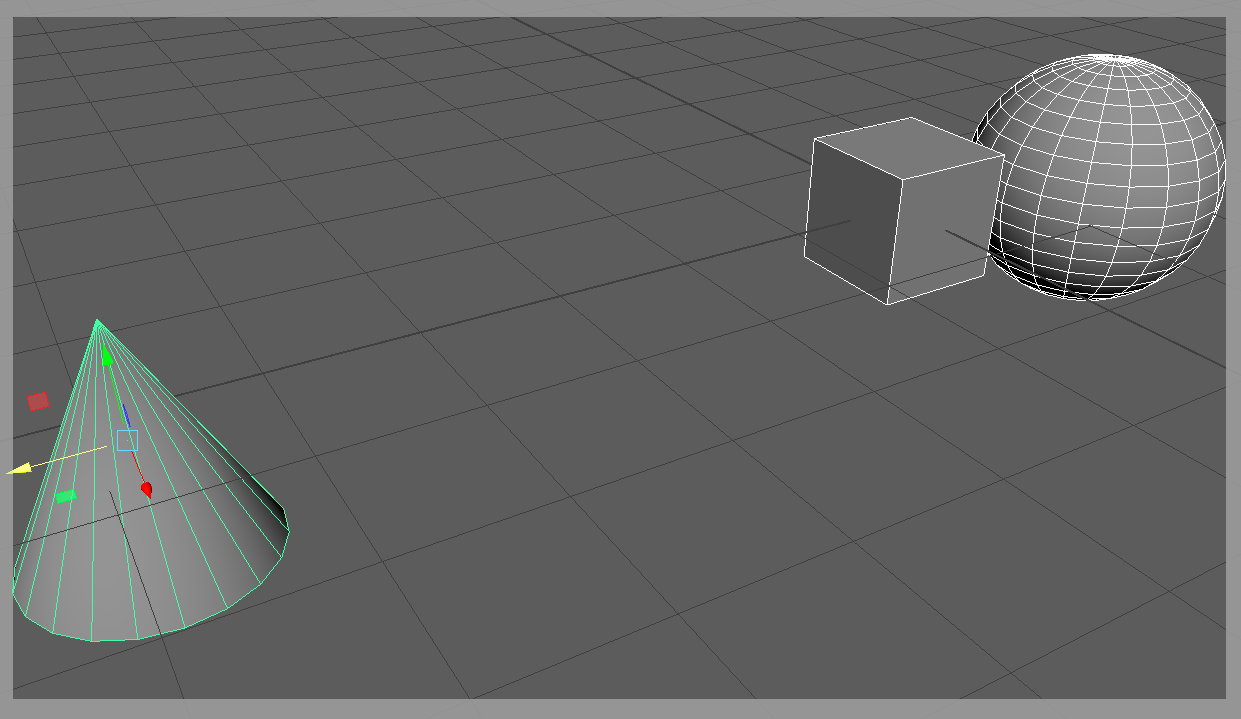
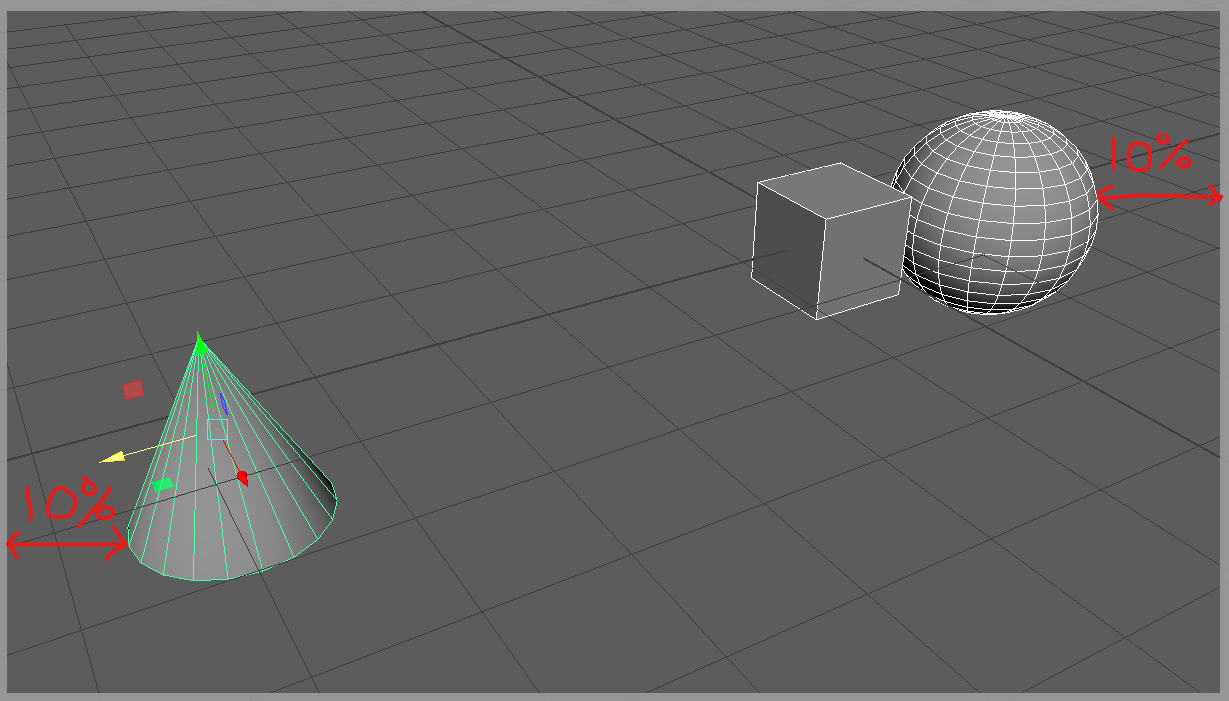
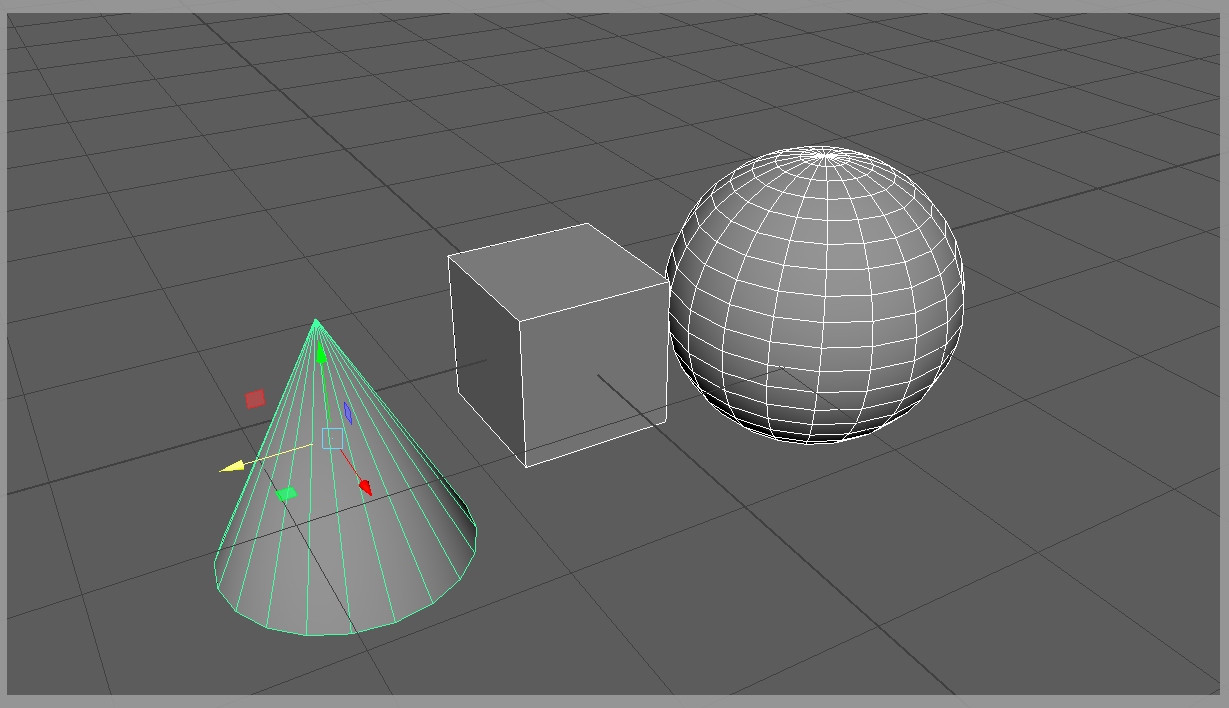
This function moves the given camera into position so the view (within the resolution gate) will have the given objects in frame edge to edge, minus the given percentage padding. It uses a combination of trigonometry, matrix & vector math, and some bounding box hacking to get the info we need to move the camera into position. It only translates the camera; it does not perform scales or rotations, nor does it change any camera attributes like field of view. It tests for both horizontal and vertical FOVs and uses the larger Z value, thus making sure the entire object is in frame.

from math import (radians, tan)
from time import sleep

from maya.api.OpenMaya import (MMatrix, MPoint, MVector)
import maya.cmds as cmds


def frame_camera_to_objects(cam, objs, padding):
    """Frame given objects with given padding.  Make sure "Resolution Gate"
    is enabled.

    Args:
        cam (str): Name of camera node to move.
        objs (list[str]): Objects to frame.
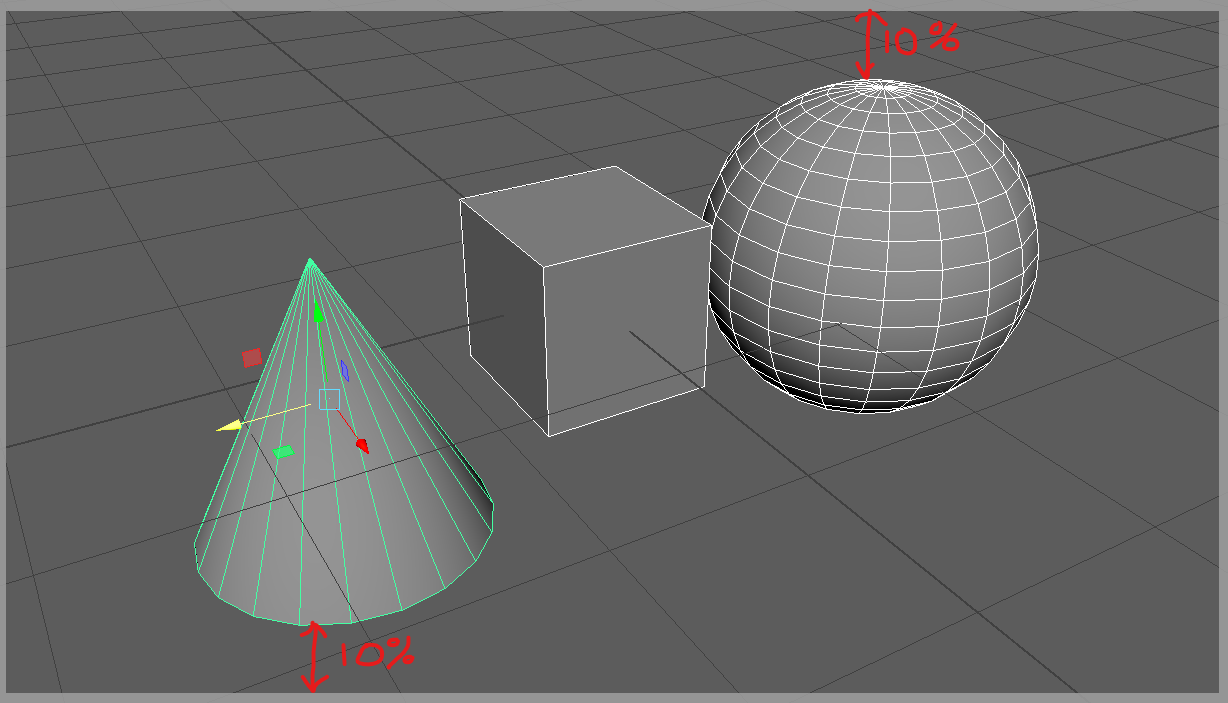
        padding (float): Padding around the frame in percentage (0.0 - 1.0).

    Returns:
        maya.api.OpenMaya.MPoint: New Position of camera.
    """
    if not objs:
        return

    # Variables

    # Camera transform matrix.
    cam_tr = MMatrix(cmds.xform(cam, q=True, ws=True, matrix=True))
    cam_fov = cmds.camera(cam, q=True, horizontalFieldOfView=True)
    render_height = cmds.getAttr("defaultResolution.height")
    render_width = cmds.getAttr("defaultResolution.width")
    frame_ar = 1.0 * render_height / render_width  # frame aspect ratio.

    # Padding
    if padding < 0:
        # No negative padding.
        padding = 0.0
    # Since padding is on both sides of the frame, the highest padding available
    # should be less than 50%.
    # No padding * 2 == 100%.
    if padding * 2 > 0.998:
        padding = 0.499

    # Vectors

    # Since we want vectors representing each side of the FOV (minus padding),
    # they need to be normalized.
    # Divide FOV in 2 to create right angle with the image plane.
    # Assume distance to image plane (adjacent side) is 1.
    # Use tangent to calculate opposite side / adjacent side ratio.
    # Since adjacent side is 1, opposite side = tan(FOV/2)
    # Calculate length of opposite side minus total padding.
    # Build vector in relation to camera (as if camera were at origin),
    # then normalize.

    # # Tangents: Used to find the edge of FOV (minus padding).
    ang_ht = tan(radians(cam_fov / 2)) * (1.0 - padding * 2)
    ang_vt = ang_ht * frame_ar

    # Padding Vectors: Vectors representing edge of FOV (minus padding).
    vec_r = MVector(ang_ht, 0, -1).normalize()  # Right
    vec_l = MVector(-ang_ht, 0, -1).normalize()  # Left
    vec_b = MVector(0, -ang_vt, -1).normalize()  # Bottom
    vec_t = MVector(0, ang_vt, -1).normalize()  # Top

    # Make a FOV matrix where the x and y axes are aligned with the right and
    # left FOV (minus padding) vectors on the camera in world-space.
    c_tr_h_mtrx = MMatrix()  # Identity matrix.
    # Build orientation matrix.  X and Y axes will be at FOV (minus padding)
    # angle and might not be at right angle. Results will be sheared.
    c_tr_h_mtrx_data = [
        (vec_r.x, vec_r.y, vec_r.z),  # x-axis: right
        (vec_l.x, vec_l.y, vec_l.z),  # y-axis: left
        (0, 1, 0),  # z-axis: cam y-axis
        (0, 0, 0)]
    for r in range(3):
        for c in range(3):
            c_tr_h_mtrx.setElement(r, c, c_tr_h_mtrx_data[r][c])
    c_tr_h = c_tr_h_mtrx * cam_tr

    # Make a FOV matrix where the x and y axes are aligned with the bottom and
    # top FOV (minus padding) vectors on the camera in world-space.
    c_tr_v_mtrx = MMatrix()  # Identity matrix.
    # Build orientation matrix.  X and Y axes will be at FOV (minus padding)
    # angle and might not be at right angle. Results will be sheared.
    c_tr_v_mtrx_data = [
        (vec_b.x, vec_b.y, vec_b.z),  # x-axis: bottom
        (vec_t.x, vec_t.y, vec_t.z),  # y-axis: top
        (1, 0, 0),  # z-axis: cam x-axis
        (0, 0, 0)]
    for r in range(3):
        for c in range(3):
            c_tr_v_mtrx.setElement(r, c, c_tr_v_mtrx_data[r][c])
    c_tr_v = c_tr_v_mtrx * cam_tr

    # Min and max points of object bounding box in relation to each horizontal
    # and vertical FOV (minus padding) matrix.
    min_max_h = get_min_max(objs, c_tr_h)
    min_max_v = get_min_max(objs, c_tr_v)

    # Minimum Horizontal point in camera-space, converted from FOV matrix space.
    min_pos_h = MPoint(
        MPoint(min_max_h[0].x, min_max_h[0].y, 0) * c_tr_h * cam_tr.inverse())
    # Minimum Vertical point in camera-space, converted from FOV matrix space.
    min_pos_v = MPoint(
        MPoint(min_max_v[0].x, min_max_v[0].y, 0) * c_tr_v * cam_tr.inverse())

    # New Position in camera-space.
    new_pos = MPoint(
        min_pos_h.x,
        min_pos_v.y,
        min_pos_h.z if min_pos_h.z > min_pos_v.z else min_pos_v.z)

    # New Position in world-space.
    new_pos *= cam_tr

    cmds.xform(cam, ws=True, t=[new_pos.x, new_pos.y, new_pos.z])

    return new_pos


def get_min_max(objs, tr_matrix=MMatrix()):
    """Returns the absolute minimum and maximum points occupied by objs based on
    the given coordinate system.

    Args:
        objs (list[str]): List of objs to establish a bounding box.
        tr_matrix (maya.api.OpenMaya.MMatrix): Matrix to derive a
            coordinate system.  Defaults to world matrix.

    Returns:
        list[maya.api.OpenMaya.MPoint]: List of min and max points,
            i.e. [(xmin, ymin, zmin), (xmax, ymax, zmax)]
    """
    min_all = None
    max_all = None
    for obj in objs:
        node_bb = node_get_bounding_box(obj, tr_matrix)
        v_min = node_bb[0]
        v_max = node_bb[1]
        if min_all is None:
            min_all = v_min
            max_all = v_max
        else:
            if v_min.x < min_all.x:
                min_all.x = v_min.x
            if v_max.x > max_all.x:
                max_all.x = v_max.x
            if v_min.y < min_all.y:
                min_all.y = v_min.y
            if v_max.y > max_all.y:
                max_all.y = v_max.y
            if v_min.z < min_all.z:
                min_all.z = v_min.z
            if v_max.z > max_all.z:
                max_all.z = v_max.z
    if min_all is None:
        return None
    else:
        return [min_all, max_all]


def node_get_bounding_box(obj_nm, mtrx_coord=MMatrix()):
    """Returns a list of min and max points of bounding box relative to the
    given matrix coordinate system.

    Args:
        obj_nm (str): Name of object.
        mtrx_coord (maya.api.OpenMaya.MMatrix): Matrix whose coordinate system
            to use to orient the bounding box. Default is world matrix.

    Returns:
        list[maya.api.OpenMaya.MPoint]: Min and max points of bounding box
            relative to the given matrix coordinate system.
    """
    mtrx_obj_orig = MMatrix(cmds.xform(obj_nm, q=True, ws=True, matrix=True))

    # If camera were at the origin, this matrix transforms the object to
    # the same orientation relative to the camera.
    mtrx_obj_coord_relative = mtrx_obj_orig * mtrx_coord.inverse()
    # Move object relative to camera if camera were at the origin.
    cmds.xform(obj_nm, ws=True, m=mtrx_obj_coord_relative)

    # There are two ways to accomplish this:
    # 1) Duplicate the object, freeze transformations, get bounding box min/max
    # points, delete duplicate object.
    obj_copy_name = cmds.duplicate(
        obj_nm, name="{}_copy_delete_me".format(obj_nm))[0]
    # Freeze Transformations, thus aligning the local bbox with world space.
    cmds.makeIdentity(
        obj_copy_name, apply=True, translate=True, rotate=True, scale=True)
    # Get Bounding box in world space.
    xmin, ymin, zmin, xmax, ymax, zmax = cmds.exactWorldBoundingBox(
        obj_copy_name)
    cmds.delete(obj_copy_name)

    # 2) Freeze transformations on original object, get bounding box min/max
    # points, undo freeze transformations.
    # cmds.makeIdentity(
    #     obj_nm, apply=True, translate=True, rotate=True, scale=True)
    # xmin, ymin, zmin, xmax, ymax, zmax = cmds.exactWorldBoundingBox(obj_nm)
    # cmds.undo()

    # Put object back into original position.
    cmds.xform(obj_nm, ws=True, m=mtrx_obj_orig)

    return [MPoint(xmin, ymin, zmin), MPoint(xmax, ymax, zmax)]


if __name__ == "__main__":
    cam_name = "camera1"
    selection = cmds.ls(selection=True)

    if selection:
        for p in [0.0, 0.10, 0.20, 0.30, 0.40, 0.50]:
            frame_camera_to_objects(cam_name, selection, p)
            cmds.refresh()
            sleep(1)
        cmds.select(selection, replace=True)

        cmds.viewFit(selection)

Get Top Level Nodes in 3DS MAX

I ran into a situation the other day where I needed all of the top level nodes of a scene, not ALL of the nodes. I also wanted to avoid using the MaxPlus API as it has been deprecated in Python 3. Here’s what I found.

1609223026406-08ZY4PF7QCF5501Q7ANR.png

For this scene, the top level nodes would be “Boxes”, “Pyramid001”, and “Sphere001”. The children of “Boxes” would not be included.

from pymxs import runtime as mxs

top_nodes = list(mxs.rootScene[mxs.name('world')].object.children)

Return ALL Nodes in 3DS MAX

There are times when you need to get all the nodes in a scene. In 3DS MAX, the most common way I’ve seen to get all the nodes is the following:

from MaxPlus import Core

nodes = Core.GetRootNode().Children

This line of code only gets you the top-level nodes. If there are any nested nodes, such as those found in groups, then only the top-most node (i.e. the “parent”) will be returned.

Scene Explorer

Scene Explorer

Scene

Scene

Only “Boxes”, “Pyramid001”, and “Sphere001” will be returned with the above code. The individual “Box00#” objects will NOT be returned. This is the native behavior of 3DS MAX. The parent of the group (which is considered a “Helper“ class) may have some actions done to it, but those actions may not cascade down into the children nodes.

For instance, if you’d like to hide all nodes in the scene, you’d THINK hiding the parent node of a group would hide the children as well.

from MaxPlus import Core

nodes = Core.GetRootNode().Children

for n in nodes:
    n.Hide = True
Updated scene

Updated scene

Updated scene explorer

Updated scene explorer

This doesn’t feel like the expected behavior, but is, in fact, what happens. So we also need to hide the children nodes, no matter how deep into nested groups they are. So when I say we need to get all the nodes…

… I mEAN ALL the nodes.

The way I’ve come up with is to list all children nodes recursively.

from MaxPlus import Core
  
def get_all_nodes(nodes=None):
    """Returns all descendants of a list of nodes.
    If None is provided, it will return all nodes in the scene.

    Args:
        nodes (list[MaxPlus.INode]|None): Nodes from which to find descendants.

    Returns:
        list[MaxPlus.INode]: List of all nodes.
    """
    all_nodes_list = []
    if nodes is None:
        nodes = Core.GetRootNode().Children
    for node in nodes:
        if node.GetNumChildren():
            all_nodes_list.extend(get_all_nodes(node.Children))
        all_nodes_list.append(node)

    return all_nodes_list

This allows you to get ALL nodes. It also allows you to get all nodes within in a group or several groups supplied in a list.

Retrieve Main Window in PyQt/PySide for DCC Apps

If you’re developing within a DCC and you create a new GUI element in PyQt/PySide, such as a QFrame, QMainWindow, or QDialog, you’re going to want the main window of the DCC app as the parent of the new GUI element. This ensures that when we close the main app, the new widget closes as well. Here are the ways I’ve gotten the main window for the most recent DCCs I’ve used:

3DS MAX 2020

reference

from PySide2 import QtWidgets


def get_qmax_main_window():
    """Get the 3DS MAX main window.
    
    Returns:
        PySide2.QtWidgets.QMainWindow: 'QMainWindow' 3DS MAX main window.
    """
    for w in QtWidgets.QApplication.topLevelWidgets():
        if w.inherits('QMainWindow') and 
                w.metaObject().className() == 'QmaxApplicationWindow':
            return w
    raise RuntimeError('Count not find QmaxApplicationWindow instance.')

Houdini 18

reference

import hou

def getHoudiniMainWindow():
    """Get the Houdini main window.
    
    Returns:
        PySide2.QtWidgets.QWidget: 'QWidget' Houdini main window.
    """
    return hou.qt.mainWindow()

Katana 3

from UI4.App import MainWindow

def getKatanaMainWindow():
    """Get the Katana main window.

    Returns:
        UI4.App.MainWindow.KatanaWindow: 'KatanaWindow' Katana main window.
    """
    return MainWindow.GetMainWindow()

Mari 4

from PySide2.QtWidgets import QApplication

import mari

def getMariMainWindow():
    """Get the Mari main window.
    
    Returns:
        PySide2.QtWidgets.QWidget: 'MriMainWindow' Mari main window.
    """

    # Set Mari main window to be in focus.
    mari.app.activateMainWindow()

    # Returns the window that has focus.
    return QApplication.activeWindow()

Maya 2020

from PySide2 import QtWidgets
import shiboken2

import maya.OpenMayaUI as apiUI

def getMayaMainWindow():
    """Get the Maya main window.
    
    Returns: 
        PySide2.QtWidgets.QWidget:  'TmainWindow' Maya main window.
    """

    ptr = apiUI.MQtUtil.mainWindow()
    if ptr is not None:
        return shiboken2.wrapInstance(long(ptr), QtWidgets.QWidget)

Nuke 12

from PySide2 import QtWidgets

def getNukeMainWindow():
    """Get the Nuke main window.

    Returns:
        PySide2.QtWidgets.QMainWindow: 'DockMainWindow' Nuke 
            main window.
    """
    for w in QtWidgets.QApplication.topLevelWidgets():
        if w.inherits('QMainWindow') and w.metaObject().className() == \
                'Foundry::UI::DockMainWindow':
            return w
    raise RuntimeError('Could not find DockMainWindow instance')

A simple “QApplication.activeWindow()” would also probably work for Nuke, but if there are multiple instances of QMainWindow, it might get confused. As far as I know, there is only one “Foundry::UI::DockMainWindow“, so it’s best to check for that.

Correct Alphanumeric Sort

If you’re in a node based program like Nuke, Houdini, or Katana, you’ll notice when you create a new node the program tries to name the node with a number at the end, thus avoiding namespace issues. The more nodes of the same name that get created, the higher the number tacked on at the end becomes. So when developing tools for these programs, there is definitely going to be a point where you will have to list nodes in order.

On the surface, this doesn’t seem like that big of an issue. They are just alphanumeric strings, after all. If you do a normal sort with alphanumeric strings, the sort doesn’t behave the way you would expect.

lst = ["var1", "var2", "var3", "var10", "var11"]
lst.sort()
print(lst)
['var1', 'var10', 'var11', 'var2', 'var3']

We humans know 10 is greater than 2, but if that number is in an alphanumeric string, the sort doesn’t care; it’s going to compile all the strings one character at a time, regardless what those characters “mean”.

So when you’re in a situation that requires you to pay attention to concurrent numbers, you need to supply a key to the sort that takes numbers into account.

import re


def alphanum_key(string, case_sensitive=False):
    """Turn a string into a list of string and number chunks.
    Using this key for sorting will order alphanumeric strings properly.
    
    "ab123cd" -> ["ab", 123, "cd"]
    
    Args:
        string (str): Given string.
        case_sensitive (bool): If True, capital letters will go first.
    Returns:
        list[int|str]: Mixed list of strings and integers in the order they
            occurred in the given string.
    """
    def try_int(str_chunk, cs_snstv):
        """Convert string to integer if it's a number.
        In certain cases, ordering filenames takes case-sensitivity 
        into consideration.
        
        Windows default sorting behavior:
        ["abc1", "ABC2", "abc3"]
            
        Linux, Mac, PySide, & Python default sorting behavior:
        ["ABC2", "abc1", "abc3"]
            
        Case-sensitivity is off by default but is provided if the developer
        wishes to use it.
        
        Args:
            str_chunk (str): Given string chunk.
            cs_snstv (bool): If True, capital letters will go first.
        Returns:
            int|str: If the string represents a number, return the number.
                Otherwise, return the string.
        """
        try:
            return int(str_chunk)
        except ValueError:
            if cs_snstv:
                return str_chunk
            # Make it lowercase so the ordering is no longer case-sensitive.
            return str_chunk.lower()
            
    return [try_int(chunk, case_sensitive)
            for chunk in re.split('([0-9]+)', string)]

Now passing alphanum_key() as the sorting key gets us exactly what we were expecting. We’ll mix it up to make sure it’s working.

lst = ["var2", "var1", "var10", "var3", "var11"]
lst.sort(key=lambda s: alphanum_key(s))
print(lst)
['var1', 'var2', 'var3', 'var10', 'var11']

Regex "AND"

On one occasion we had a PySide QListView with a QSortFilterProxyModel and we wanted to use regex for the filtering. QSortFilterProxyModel does accept regex for filtering so we figured this wouldn’t be a problem. One of the requirements was the filtered text would be space delineated. For example, if the user typed “red blue”, it would now have 2 search terms: “red” and “blue”.

Next to the filter text box were 2 radio buttons denoting “AND” and “OR”. The user would use one of these button to let the filter know what they expect from the returned items; if the user selected “OR”, the filter would return all items found with “red”, all items found with “blue”, and all items found with both “red” and “blue”; if the user selected “AND”, the filter would ONLY return all items found with BOTH “red” and “blue”.

Lucking for us, regex supports OR right out of the box. It’s denoted by “|”.

But AND… is not. So we have to build it. The code for regex AND is:

(?=.*'first term')(?=.*'second term').*

You can use as many terms as you want as long as they’re contained in their own parentheses. So the next step would be to get all of your key words in a list and build your regex using string “join” and “format” methods.

search_strings = str(filter_text).split()

pattern = QtCore.QRegExp()
if search_strings:
    if filter_type == AND:
        # AND
        # regex pattern = (?=.*'first term')(?=.*'second term').*
        pattern = QtCore.QRegExp(
            '{}.*'.format(
                ''.join(
                    [
                        '(?=.*{})'.format(search_string)
                        for search_string in search_strings
                    ]
                )
            ),
            QtCore.Qt.CaseInsensitive
        )
    else:
        # OR
        # regex pattern = 'first term'|'second term'
        pattern = QtCore.QRegExp(
            '|'.join(search_strings),
            QtCore.Qt.CaseInsensitive,
        )

sortfilterproxy.setFilterRegExp(pattern)

Houdini Hotkey Overrides

For whatever reason, I never could find actual documentation on coding hotkey for Houdini. If you’re making a specific environment for the artist to launch Houdini with specific tools, then those hotkeys need to be mandatory, especially when you’re overriding the BIG stuff, like “Open” and “Save”.

Hotkey overrides are spread across 2 files: HotkeyOverrides and MainMenuCommon.xml. These should be located in your HoudiniPath environment variable.

MainMenuCommon.xml adds the ability to customize the main menus. Documentation for it can be found here. In the case I used it, we overrode opening a scene with our own code. You can tell it what menu to put the item in, before or after which item to place your new item, what code to launch with your new item, and (if you’re replacing an item) what item to remove. When adding an item, you give it an id, so you can add a shortcut key later.

<?xml version="1.0" encoding="UTF-8"?>

<mainMenu>
    <addScriptItem id="h.open_scene">
        <label>Open</label>
        <parent>file_menu</parent>
        <insertAfter>h.new</insertAfter>
        <scriptCode>
            <![CDATA[
from houdini_code.scene import open_scene
open_scene()
]]>
        </scriptCode>
    </addScriptItem>

    <removeItem id="h.open"/>
</mainMenu>

HotkeyOverrides adds the actual hotkeys. It is a tab delineated file. The first section is the id you created in the MainMenuCommon.xml. The second section is the label that is used in the menu. The third section is description. The rest of the sections are the key combinations you’d like to assign to that command.

h.open_scene	Open	"Open file"	Alt+O	Ctrl+O

Executing the CurveTool

We ran into an issue one day of trying to run a group on the farm.  One of the nodes within the group was a CurveTool with "Curve Type" ("operation" knob) set to "Max Luma Pixel".

CurveTool

We had to get the CurveTool to run for the WHOLE frame range BEFORE the script could render because there were some expressions that were dependent upon the max and min data for the whole range.  So there were 2 solutions we thought of:

  1. Run the CurveTool before you send to the farm.
  2. Send to the farm and run the curve tool before the render.

The second solution was ideal because the techs didn't want to wait for the CurveTool to finish before they could work on the next script.  Send it to the farm and let the farm worry about it.  But how do you do that?

nuke_execute

According to the API, nuke.execute() can take a node and "execute" it if it has specific code to do so.  For instance, the Write node has a "Render" button that's executed.  So in this case, we use nuke.execute() to run the Curve tool for the frame range we need.  For our purposes we passed in the name of the node and the first and last frame and put in the "beforeRender" knob in the write node that would be used to render.

write_node

This worked... but it was inefficient.  The farm split the render script across a bunch of machines (which is the point of the farm).  On each machine, it was executing the curve tool for the whole frame range before the write node rendered its little section of the render.  Each script was executing the whole range in the curve tool just to render a few frames.

So we thought of a 3 option:

  • Create a job that executes the whole range in the curve tool, save the script, and create a render job using the same script.

So we did just that.  In the CurveTool's Python tab, we put the following code in the "afterFrameRender" knob: 

We ran into some issues with just calling nuke.scriptSave(); using nuke.scriptSaveAs was good because it has an 'overwrite' argument.

But then we ran into another problem: how do we get it to execute on the farm?

Well when we send things to the farm, we're actually sending a command line to execute.  When accessing the command-line help for Nuke, there is an option for supplying the names of the nodes to render:

It says "execute" instead of "render", so that gave us hope.  So we created a job that passed the name of the CurveTool, which is "GroupName.CurveToolName" when it's inside a group.  Once executed on the farm, the script had all it needed to render on multiple machines.

So in the end, I didn't actually use nuke.execute(), but it sent me down the collaborative rabbit hole that led to the solution.  I'm looking into taking this to the next logical step, which is to get the keyframes from the CurveTool written out to separate files or to database entries so the script can be run on several machines at once.  They'll then be collected and will populate the CurveTool before the render happens on multiple machines.  I'm sure we'll find the best way to do it eventually.  Just like with the original CurveTool problem, I know it can be done.  We'll just have to fall down that rabbit hole when we get to it.

print "Hello, World!"

My first post!

As of this writing, I've been a Pipeline Technical Director for 3 years, so I'm thinking this will be a place for me to throw snippets of code, ideas, and challenges to overcome in my TD career.  A lot of the code I've written professionally is proprietary so I can't share it without breaking NDAs I've signed, so a lot of the things I'll post will have to be generalized.

Let the fun times commence!